Table of Contents
HTML is the basic code that an author writes to tell website browsers (Microsoft Edge, Google Chrome, etc.) what text/images/links to display.
Typically, CSS is added to change how html is displayed, while JavaScript adds functionality.
I use WordPress, which pretty much does all the HTML and CSS for you. That is unless you want to add some or all of it yourself. You probably have to google how to add CSS and JavaScript to a website built with WordPress, whereas HTML is easy to add.
- Click this button to become a paid (or even free) Patreon member. Every paid member is a great help! I am putting together collections of electronics based diagrams that illustrate topics popular with my YouTube viewers.
Easy ways to get some practice writing HTML:
Windows notepad:
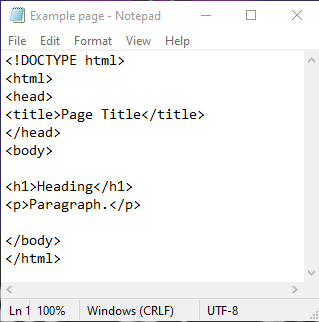
- Practice writing HTML with notepad:
You can easily practice HTML with a Windows based computer by opening up notepad, and then typing out something like what you see in this screen shot image.
- Save your written HTML so that you can use a browser to view it like a webpage:
After saving the file with the .html extension (I saved it as Example page.html), you can open it with a browser to see how it will look to people using the same browser to open a page written with the same HTML text. It might look different on different browsers.
- Go to where you saved the file.
- Right click the file.
- Hover the mouse cursor over “Open with”.
- Some of the options that pop up should be internet browsers. Click whatever option you want to open the file with. The more you experiment with different programs that are trustworthy, the better.
Visit sites that teach HTML and have interactive windows:
- Many websites, such as https://www.w3schools.com/ show you sample code in a window (which you may be able to edit) and provide a window next to it that shows what you can expect a browser to display.
Right click website element to inspect it:
If you are visiting a webpage with a windows PC browser, and you want to see HTML and other coding used to design it…
- Right button mouse click on part of the page you are interested in. This will pop up a window with options to click.
- Left click the “Inspect” option to view the coding text used to build the page.
Tags
While writing HTML, you will have a lot of letters and words between angle brackets. The combination of them is called a tag. <h1> and <p> are common tags. You will see a <h1> followed by a </h1> and a <p> followed by a </p> which are elements, and covered in more detail further down the page.
- The tags do not show up on the webpage that is being viewed by the visitor. They ultimately tell the browser how to display what is in between the tags.
- I have to use some different text in my HTML to let my tag examples be displayed on browsers.
- In order to show tag samples on pages of my website while I an using the “what you see is what you get” visual tab.
- WordPress types the following into the document so that the browser displays angled brackets…
- < displays a <
- > displays a >
<p></p> Was written as what is shown below…
<p></p>
Look for where each of the following are placed p – /p – < – and – >
Single tag:
- <!DOCTYPE html> – First tag of a html document to let the browser know it is an html document.
- <html lang=”en”> – Commonly nestled (inserted) inside the head tags. Lets the browser and search engines know that the page is written in English.
Container tag (Elements):
Has a starting tag (such as <p>) and an ending tag (such as </p>). The ending tag is the same as the starting tag but with an added forward slash. There will be other stuff, possibly other elements, within those tags.
- <html></html> – Added after !DOCTYPE html, contains everything that is part of the webpage, including the following….
- <head></head> – Contains a lot of page related stuff that may or may not affect the appearance of how the browser shows the page. WordPress takes care of the head for you if that is what you are using. You can get a plugin that lets you modify the head if you want to while using WordPress.
- <title></title> – Nestled in the head element. Contains text (only) that is shown in the browser tab and other places.
- <body></body> – Added after the head. The body contains the information of the page that will be viewed by someone visiting the webpage.
Adding Headers
HTML has 6 headers which are used to display enlarged text of your choosing. They are used to help organize a page and their appearance can be modified with CSS if desired.
The table of contents at the top of my web pages (Provides by a WordPress plugin) automatically lists the headers that I add to the page. It arranges them based on whether they are H1, H2, H3, H4, H5, or H6 headers.
Examples:
The following shows how the browser displays the tag, followed by the way I wrote the tag for the browser to read it.
H1
Was made with the following…
<h1>H1</h1>
H2
<h2>H2</h2>
H3
<h3>H3</h3>
H4
<h4>H4</h4>
H5
<h5>H5</h5>
H6
<h6>H6</h6>
Usually I center my headers. I just click the appropriate button added to the WordPress Visual tab. But it adds the following code, which could be typed out in the text tab or html document.
Align Centered H3
<h3 style=”text-align: center;”>Align Centered H3</h3>
Please note that align is actually CSS, not HTML.
Items can also be aligned right.
Aligned right H4
<h4 style=”text-align: right;”>Aligned right H4</h4>
And although text is aligned left by default, you can still add the code to do so.
Aligned Left H5 Header Text
<h5 style=”text-align: left;”>Aligned Left H5 Header Text</h5>
Paragraph Tag <p></p>
This is a paragraph
Written as…
<p>This is a paragraph</p>
To make the page display the brackets for this page I had to write the following…
<p>This is a paragraph</p>
- A paragraph is basic text like that shown right below the “Paragraph<p></p>” H2 header.
- Below “This is a paragraph” is the proper way to tell the browser to display that text by putting it between the <p></p> (opening and closing) brackets. However, the browser should also display the text just like that if you just write it in without the <p></p> brackets.
- I also showed code needed to display <p>This is a paragraph</p> to the browser. The browser removes the <p></p> when typed directly as text.
Strike through:
This is no longer important.
Was made with…
<del>This is no longer important.</del>
or …
This is no longer true.
was written as
<s>This is no longer true.</s>
Small element/tag
Additional information that doesn’t need to stand out as much.
Was written as…
<small>Additional information that doesn’t need to stand out as much.</small>
<hr />
<hr />
- The text (<hr />) below the horizontal line shown above was used to display the horizontal line itself.
- Below that text, is the text needed to display the coding text to the browser without the brackets being removed by the browser.
I’m not going to display the added text that is needed to have your browser show the brackets anymore.
More Formatting Elements Examples:
Screen shot of some HTML Formatting elements that I typed out in notepad, saved as an .html file, and then opened up with Google Chrome in incognito mode. Actual file location on my computer as been replaced with “File location” text.

Links <a> hyperlinks
Click here to open Electronzap main page in a new tab
HTML that made that link…
<a href=”https://www.electronzap.com/” target=”_blank”>Click here to open Electronzap main page in a new tab</a>
- a tag = hyperlink.
- href=” ” is the link definition.
- Between <a ….> and </a> is the link text that will be displayed by the browser.
Where link opens at.
-
- _blank – New tab.
- _self – Same tab currently being viewed.
- _parent – In parent frame.
- _top – Full body of the window.
Button link:
HTML I used to make the button link above. It opens this page again.
<a href=”https://electronzap.com/introduction-to-html-hyper-text-markup-language/” target=”_blank” rel=”noopener”><button>Introduction to HTML &#8211; Hyper Text Markup Language</button></a>
- All I did was take the code of a link I had WordPress make for me, and I added <button> after everything in the <a…> tab, and then </button> right before </a>
- rel=”noopener is automatically added to links that open in a new tab while using WordPress (which is what I usually use) to create them. It helps with security and should not should not cause any problems. A topic not covered further on this site.
Lists – Unordered – Ordered
Unordered <ul> list items <li>
- First unordered item indicated by a bullet point dot.
- Second unordered item indicated by a bullet point dot.
- You can keep adding as many items as you want…
How that looks in HTML….
<ul>
<li>First unordered item indicated by a bullet point dot.</li>
<li>Second unordered item indicated by a bullet point dot.</li>
<li>You can keep adding as many items as you want…</li>
</ul>
Ordered <ol> list items <li>
- First ordered item in a list.
- Second ordered item in a list.
- You can keep adding as many items as you want…
How that looks in HTML
<ol>
<li>First ordered item in a list.</li>
<li>Second ordered item in a list.</li>
<li>You can keep adding as many items as you want…</li>
</ol>
Table
| Items: | Color: | Size: |
|---|---|---|
| Item 1 | Red | Large |
| Item 2 | Green | Medium |
| Item 3 | Blue | Small |
Below is the HTML used to create the table above… Keep in mind that you can copy code like this, rename things to what you want, while also adding or removing columns (up/down) and rows (left/right) as desired.
<table>
<tbody>
<tr>
<th>Items:</th>
<th>Color:</th>
<th>Size:</th>
</tr>
<tr>
<td>Item 1</td>
<td>Red</td>
<td>Large</td>
</tr>
<tr>
<td>Item 2</td>
<td>Green</td>
<td>Medium</td>
</tr>
<tr>
<td>Item 3</td>
<td>Blue</td>
<td>Small</td>
</tr>
</tbody>
</table>
Description list <dl>, terms <dt>, description <dd> elements
- HTML:
- Adds basic text, images, links etc. to be viewed by a browser.
- CSS:
- Modifies the appearance of HTML content.
- Javascript:
- Adds complex features.
HTML used above
<dl>
<dt>HTML:</dt>
<dd>Adds basic text, images, links etc. to be viewed by a browser.</dd>
<dt>CSS:</dt>
<dd>Modifies the appearance of HTML content.</dd>
<dt>Javascript:</dt>
<dd>Adds complex features.</dd>
</dl>
Contenteditable (content editable)
Actually click the following line and start typing.
Click this line to edit it.
<p contenteditable=”true”>Click this line to edit it.</p>
Editable list:
- Click this line to edit it.
- Click this line to edit it.
- Click this line to edit it.
<ul contenteditable=”true”>
<li>Click this line to edit it.</li>
<li>Click this line to edit it.</li>
<li>Click this line to edit it.</li>
</ul>
Abbr element (Abbreviation)
Hold the mouse over the abbreviation to see what words it stands for.
html
Was made with…
<abbr title=”HyperText Markup Language”>html</abbr>
CSS
Was made with…
<abbr title=”Cascading Style Sheets”>CSS</abbr>
Iframe
Iframe can easily insert other documents directly into the page as shown below. I added the main page of this website below.
<iframe src=”https://electronzap.com/”></iframe>
Size and width can be easily adjusted as shown below. And it is good to add a title.
Was made with
<iframe src=”https://electronzap.com/” height=”400″ width=”600″ title=”My main page added to this page”></iframe>
Bonus Iframe improved with CSS
This makes the Iframe window as wide as the content of the webpage. Note how I made the height is 400px instead of “400” since we are using CSS now. There is also a border added.
<iframe id=”Iframe” style=”width: 100%; height: 400px; border: 3px solid black;” src=”https://electronzap.com/”></iframe>
<pre>
This is preformatted
<pre>This is preformatted</pre>
Color form:
- Slider and clicking on the color desired to pick out color.
- Clicking on the eye dropper symbol selects color.
- Up down bracket symbol changes whether the results is displayed as a HEX, RBG or HSL color code.
<form><input type=”color” /></form>
Also (probably added later)
- sub
- sup
More examples of HTML tags are going to be added later!
Inline CSS (bonus material)
CSS is commonly used to modify how each type of HTML element (<h1></h1> , <p></P> , etc.) is displayed throughout a page. This is known as either internal or embedded CSS.
Inline CSS however, specifically modifies an individual element. So I think it is good to start learning it while learning HTML.
Color:
This paragraph is green.
<span style=”color: #008000;”>This paragraph is green.</span>
This paragraph is red.
<span style=”color: #ff0000;”>This paragraph is red.</span>
You can make part of the text blue in this way.
<p>You can make <span style=”color: blue;”> part of the text blue</span> in this way.</p>
Or make the text brown like this.
<p style=”color: brown;”>Or make the text brown like this.</p>
Another way to make brown text.
<span style=”color: #993300;”>Another way to make brown text.</span>
Also changing size, font and aligned to the center:
Green, larger, italic font and aligned center.
<p style=”color: #009900; font-size: 30px; font-style: italic; text-align: center;”>Green, larger, italic font and aligned center.</p>
Plus a border:
Green, larger text, italic font and aligned center.
<p style=”color: #009900; font-size: 30px; font-style: italic; text-align: center; border: 5px solid gray;”>Green, larger text, italic font and aligned center.</p>
Modified again:
(compared to example above…)
Blue, not as large text, cursive font, thicker red border, and aligned right.
<p style=”color: #000099; font-size: 15px; font-family: cursive; text-align: right; border: 10px solid red;”>Blue, not as large text, cursive font, thicker red border, and aligned right.</p>
A few font comparisons
Arial font.
Italic font.
Cursive font.
Fantasy font.
<p style=”font-family: arial;”>Arial font.</p>
<p style=”font-family: italic;”>Italic font.</p>
<p style=”font-family: cursive;”>Cursive font.</p>
<p style=”font-family: fantasy;”>Fantasy font.</p>
Note: Italic font isn’t showing up on my phone when I view this page. The text still looks like the arial font, which is the default. Each device/browser has a limited number of fonts it will recognize, and will often display it differently even when it does recognize it. Fantasy looks different on my phone than it does on my laptop. These things must be considered when choosing a font.
To support this site, check out the following links:
- Become a Patron!
- Check out my YouTube videos! https://www.youtube.com/c/Electronzap/videos
- Products I used in my videos or otherwise think look like a good buy. As an Amazon associate, I earn from qualifying purchases. My Amazon affiliate page showing products I think look good
- Information on this site is not guaranteed to be accurate. Always consult the manufacturer info/datasheet of parts you use. Research the proper safety precautions for everything you do.
- Electronzap is a participant in the Amazon Services LLC Associates Program, an affiliate advertising program designed to provide a means for sites to earn advertising fees by advertising and linking to amazon.com.